Monday, December 15, 2014

Apple Crostata

A crostata, for those of you who don't know (like myself until about a week ago), is a form of Italian pastry, or as defined by Dictionary.com- "A baked tart, either open-faced or topped with a lattice crust, that is filled with fruit, jam, ricotta cheese, or other ingredients." So that's exactly what I'm gonna give you- an easy recipe for a apple crostata that only requires a few simple steps. You can impress a lot of people with this pretty pastry, and they never have to know how easy it is to make! I imagine I will be making many more varieties of these in the future, and of course I'll share those recipes with you as well!

So, I kinda went at this blindly.. I watched someone make a cream cheese and prosciutto crostata on the food network the other day, and got the idea from her. So here we go:

Start with a few simple ingredients- Apples, pie crust, corn starch, sugar and cinnamon. Yum!

Peel and slice your apples into pretty skinny pieces, that way they bake quickly.
After you've added the cinnamon/sugar/corn starch mixture to the apples, roll out your pie crust, and lay the apples out on top, leaving about an inch or so around the edge.
Now you want to fold up the edges, overlapping where necessary. It doesn't have to be perfect (obviously), but you want to make sure you have sealed the seams well so the delicious appley juices don't run out.
Dip a butter knife (or pastry brush if you have one) in water, and spread a light coating of water on top of the crust. Then sprinkle lightly with sugar.
Bake.. and Voila! A beautiful yet easy Italian pastry. Be sure to tell all your friends its a crostata, and when they ask what that is, emphasize Italian pastry.. that'll impress 'em!
That's all there is to it! Yay! And let me tell you, it was soo tasty! It wasn't perfect, however, no one will care once they eat it ;)

Apple Crostata

Yields: 8 Slices
 
2 Medium Apples               2 tsp. Corn Starch
2 tsp. Cinnamon                  1 9-inch Pie Crust
1/2 C. Sugar + 1 Tbsp.

1. Preheat oven to 400 degrees
2. Peel and core apples, and slice into thin slivers
3. In a bowl, mix apples with cinnamon, 1/2 C. sugar, and corn starch until apples are coated
4. Roll out pie dough onto cookie sheet
5. Lay coated apple slices out on pie dough in a circle shape, leaving about 1 inch around edge
6. Fold up the remaining edges of the pie crust, overlapping where needed
7. Brush a small amount of water on crust edge and sprinkle with remaining sugar
8. Bake for ~15-20 minutes, or until crust is golden-dark brown and apples are soft when poked with a toothpick.
9. Enjoy!!


Wednesday, December 10, 2014

A New Perspective

When you're running the 3200 meter race during a track and field event, you're supposed to find a good pace and keep that pace throughout most of the race. This is a lot like writing a blog.. find a good pace, and keep it. Unfortunately, I started this blog like it was a 100 meter dash, instead of a long race, and hit that wall pretty quick. I haven't posted in a few weeks, mostly because school and life have caught up with me. Life is kind of funny like that, right? Some may even say its hilarious, especially when it sucker-punches you in the gut.

I think that sometimes, in order to stay sane, we have to take a step back and try to view things from a different perspective. Facing life's wrath is something that is unavoidable, but at times, it can feel like everyone and everything around you is moving so fast, and you're stuck struggling to take 2 steps forward without tripping. Trust me when I say that it's okay to trip, even if you fall. It's in those moments when you're picking yourself back up that you realize what and who is truly important in life. Over the past couple weeks, the sequence of events that has taken place in my life is a sequence which is hard to wrap my head around. Imagine yourself being pelted with snowballs by your friends, and you continually say stop, but they're having fun so they keep going. Finally, you reach you're breaking point and just scream, "STOP!" and everyone looks at you like you're nuts.. Yup, I'm that crazy person. Except life was the one pelting those snowballs- or maybe even rocks- at me. In that "STOP!" moment however, that moment when you feel like everything spinning around you pauses for a brief second right before you hit the bottom, I remembered something very important; 

Peter 5:7 - "Cast all your anxieties on Him because He cares for you."

And in that moment, the snowballs suddenly became something I could dodge, catch, or handle even if they hit me. In that moment, I could breathe again. In that moment, I gained a new perspective. 

Wednesday, November 5, 2014

The Everyday Struggle

So, during my time on social networks throughout the day, I see an alarmingly large amount of people using the phrase "The Struggle is Real." Not familiar? Click here ---> Here .. This "here" link should take you directly to a buzzfeed website listing 28 times when people thought the struggle was real. Yup, every single day people honestly think that these things are a struggle. I'm no exception, that's for sure. However, every once in a while I stop to think about these petty things I "struggle" with, and I can't help but almost laugh out loud at myself. (LOL). Okay anyways, I can't even imagine the sufferings of people throughout the world who would praise a God they might not even know if it meant they could struggle like we do. So let me throw some findings your way (note I said findings, not facts, but I think they're pretty close to accurate):

1. There are in this very second (according to Worldometers) 7,272,407,460 people in the world.
2. 868 Million people are Undernourished in the world.
3. Every year, 2.6 Million children die due to hunger related causes
4. In 2012, 1.6 Million people died from HIV/AIDS

What do these numbers mean? I can't save the world? There are always going to be people dying out there? Survival of the fittest? These are all legitimate excuses for ignoring the problem..

Let me break it down for you.

1. Lets pretend instead of billions of people, there's only 600. New York Times says that's a rough average estimate of how many other people a person may know.
2. Of those 600 people, 72 of them are undernourished because they're starving to death
3. Within the next 3-4 years, one of those 600 people will have a child who will die from hunger. You'll probably have to attend their funeral.
4. In the next 8-10 years, one of those 600 people will contract AIDS and die. Again, another funeral for someone you know.

I'm not trying to get you to donate to my cause, or fund my trip to Africa to save everyone. I just want you to stop for 2 seconds next time you're struggling to put your feet on your carpeted floor and jump in your warm shower and think about others. I can only hope that if we all do this, it will make a difference in what we all refer to as "The Struggle."

Saturday, October 25, 2014

Mini Apple Pies

I don't have a good track record with pies. I think I've made 2 attempts at baking pies, epically failing both times. My pie generally looks more like cobbler by the time I'm done. It's kind of unfortunate considering I have a pretty famous pie baker in the family (my grandma). So, grandma, if you're reading this, I'm going to apologize in advance because I did not make homemade pie crust, however, my excuse is that I didn't have your recipe. Anyways, mini pies are all the rage right now and I just couldn't resist trying my hand at them regardless of my skills set.. This is a pretty lengthy process so here we go;


So your final product will look like this. Cupcake sized pies that are perfect for single servings, for events such as family dinners or small parties. Some people are even substituting these tiny desserts for cake at weddings.


 First step of the process is to cut up some apples. I cut WAY too many, so I'm not sure if my apples are just huge, or I really over-estimated. However, it turned out okay because I just baked the excess. Anyways, peel the apples, and core them..


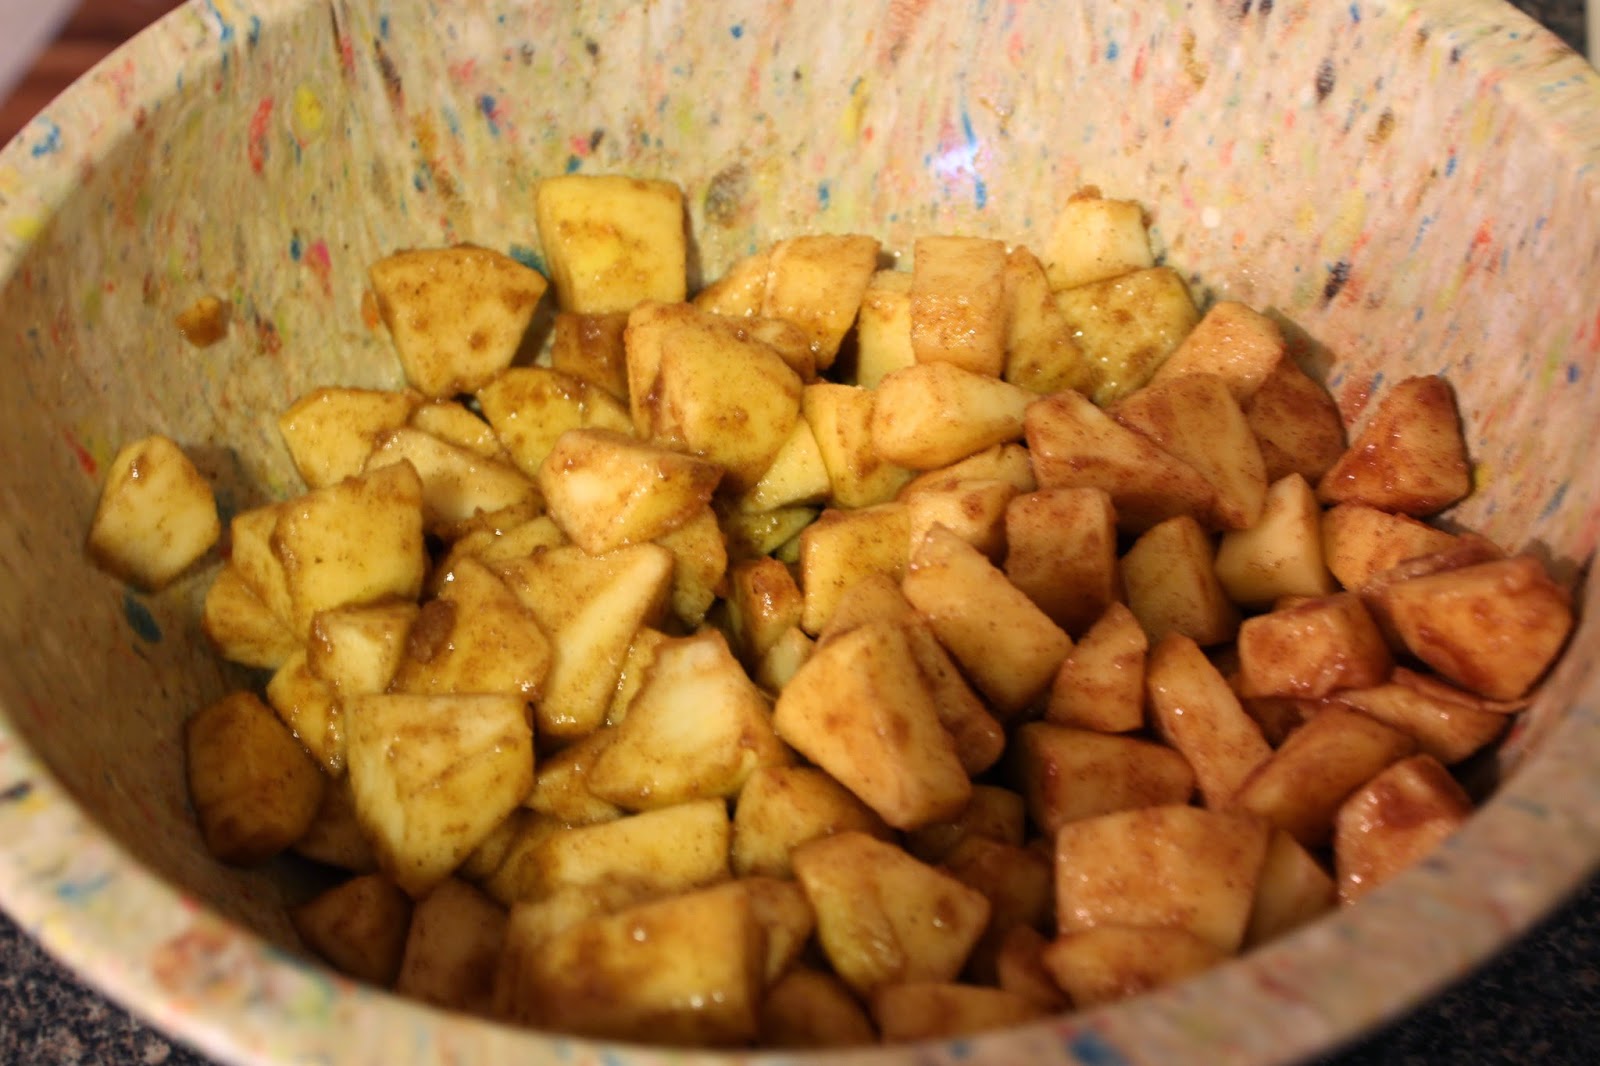
Then you're gonna want to cut up your apples into pretty small pieces. Again, I cut mine too big at first so this picture is a little off. (Let's remember this blog is titled trial and error..) Once you've got the apples into pretty tiny pieces, throw them in a bowl.


Toss those bad boys in the cinnamon sugar mixture that will be listed below until they're completely covered.


Roll out your pie dough, and cut into circles. Your mini pies are going to be baked in a cupcake pan, so whatever you use must be about twice the size. I used the lid to a large Bath and Body works candle. (I'm a college kid. If I learn nothing else, at least I'm resourceful). I used store bought dough, so I got about 8 circles out of one sheet (enough for a 9 inch regular shell).


 Place your dough circles into a greased cupcake pan and poke a few holes in the bottom to allow the air out.


Fill up your pies with the apples just to the top.


Roll out your other sheet of dough and cut it so its a rectangle. You need this to top your pies.


 Now, I know you're thinking how did that rectangle turn into that lattice looking thing. It wasn't magic. Cut your dough into pretty skinny strips, then your just continue to lay pieces down and create a lattice, overlapping the strips. I know it looks complicated, but its not. Its just tedious. However, be sure you lightly press down where the stripes overlap so it wont just fall apart.


Use a smaller circle to cut out circles from the lattice dough to top your pies. I used an actual cookie-cutter this time. Then carefully place it on top of your pies and pinch around the edges to seal it. Place a little cold butter on top and you're ready to go into the oven!


Your finished little pies should look like these! Those are the extra apples I baked and they were delicious! I was so excited when these turned out as good as they did.. Frankie doesn't even like apple pie and he ate them ;)

Mini Apple Pies

Yields: 8 Mini Pies

3-4 Medium Apples (I used Gala)        1 Tbsp. Flour
1/4 C. Sugar                                          1 tsp. Cinnamon
1/4 C. Brown Sugar                               Pinch of Salt
1 tsp. Vanilla Extract                             2 9-Inch Pie Crusts
2 Tbsp. Butter

1. Preheat oven to 425 degrees and grease cupcake pan.
2. Peel and core apples, then slice into very small pieces (about the size of a fingernail).
3. In a bowl, mix sugar, brown sugar, flour, cinnamon and salt til combined, then add vanilla extract and mix thoroughly.
4. Add apple slices and mix until the apples are completely coated.
5. Roll out pie crust (if pre-rolled, roll out a little more anyways). You need it to be pretty thin. 
6. Use a circle cutter to cut circles out of the dough large enough to fill the cupcake pan. (About 3 inch diameter.)
7. Push dough circles into individual cupcake molds so it covers the bottom and sides. 
8. Use a fork to poke a few holes in the bottom of each pie to allow the air to escape while baking. 
9. Fill unbaked pies with apple filling until they are full just above the top.
10. Roll out second pie crust just as before. Then cut sides so that the crust is a square shape.
11. Cut the square dough into skinny strips.
12. Lay the strips down in order to create a lattice. A picture is showed above. This is a hard thing to explain, but I promise it's not that difficult.
13. Once you have created a decently large lattice area, lightly roll your rolling pin over the top in order to secure all the seams.
14. Use a smaller circle cutter (about 2x2 inch.) to carefully cut circles out of the lattice. 
15. Take each lattice circle and cover each pie with one, and pinch sides to seal.
16. Place a small piece of butter on top of each pie (about 1/4 Tbsp.)
17. Bake mini pies for about 20 minutes, or until the crust is golden brown
18. Allow to cool, remove from pan, and enjoy! :)

Wednesday, October 22, 2014

Baked Corn

   Baked Corn has been a favorite dish of mine for a really long time. I remember back when I was waaaay pickier about food than I am now, it was one of the only things I would eat at family reunions. I wouldn't say it's really a main course, however, since I am usually only cooking for two, it's much easier to just pretend it is and not worry about cooking anything else with it. Then I only have to deal with a few leftovers (enough for lunch tomorrow). Anyways, this is a great fall food, and I hope you enjoy it as much as I do!

Here's everything you need to make Baked Corn! Pretty simple right? 

First step of this recipe is to dump all the ingredients in a bowl and mix. The exact measurements will be listed below.
In a greased dish, spread the gunk (yeah, it looks like gunk) until it looks even on top. I would recommend using a glass 9x9 dish, however, as you can see in this picture, I don't have one of those so I used whatever I had. (Hint Hint to anyone coming to my bridal shower/wedding)
After it's baked, it will look something like this. Ladies and gentlemen (if there's any gentlemen actually reading this), this is heaven on earth. It contains all the necessities for such a dish- corn, bread, cream, butter and cheese. It's a done deal. 
Bon Appetit!

Baked Corn 

Yields: ~ 1 9x9 Dish 

1 Jiffy Corn Bread Mix
1 can Creamed Corn
1 can Whole Kernel Corn - drained
1 C. Sour Cream
1 C. Cheddar Cheese (optional, but why omit it?)
4 Tbsp. Butter - melted

1. Preheat oven to 350 degrees and grease 9x9 baking dish
2. In a medium-sized bowl, mix all ingredients until combined
3. Spread mixture into greased pan
4. Bake for 1 hour until top of dish is a golden brown
5. Allow to cool for 5 minutes (seriously, its important) & Enjoy!
 

Tuesday, October 21, 2014

I'm No Photographer

Do I have you attention yet? No?

 How about now?

I just finished up making and photographing these beautiful brownies. OMG so good. I love these Reese's chips. I got mine at Kroger, but they sell them just about everywhere :) Just made some good ole' Duncan Hines brownies (according to the more cakey recipe so they'd get nice and fluffy) and I threw in a few handfuls of those peanut butter chips. Mmm Mmm Mmm. A friend of Frankie's is coming over later so they can study so I thought I'd make them something good to snack on. I know, I'm wife material.

I've been trying my hand at taking better pictures lately. I've found recent interest in photography and what better way to practice than by taking pictures of the food I make and eat. Thanks to Frankie's very confusing and very expensive camera (he's actually good at this picture-taking stuff), I have been able to learn a few tricks of the trade, but I'm not nearly as good as him. Anyways, I guess what I'm getting at here is that this blog will never contain professional-looking, jaw-dropping pictures taken by me. However, I'll give it my best shot, and find perfectly good satisfaction in that.

Now, do me a favor, and go make some brownies.


Monday, October 20, 2014

Get Rid of that "Stinkin Thinkin"

An extremely sweet and successful Mary Kay director I know has this funny saying that she uses all the time when one of us fabulous ladies starts that demise into a funk- Stinkin' Thinkin'. What is Stinkin' Thinkin' for those of you who aren't familiar? Well, I'd say it's anything you think or say to yourself or others that isn't in a positive manner.
     Ex) "I'm/You're not good enough"
             "I/You don't know how"
             "I/You can't"

These are just a few very minor examples of stinkin' thinkin' but to be quite frank about it, its thinking that just plain stinks. So how do we take out the garbage so our thinkin' will quit stinkin'?

   I don't really have an answer to that question. I'm hoping maybe somebody out there is an omnipotent being and can give me all the answers but I'm still looking. I will say that one thing I've found that really helps me is to remember something else a fabulous Mary Kay director once told us.. Say your Affirmations. My Whaaaaat? Well, let's go over the definition of an Affirmation real quick to clear that up- "the action or process of affirming something."
   And here we go with another Mary Kay saying- "What you think about you bring about." So let's bring all these things together. If the things you think about you bring about, and a great way to bring yourself from stinkin' thinkin' is to say affirmations then what does this mean for us?
   Well, for me, its means that when I'm feeling down, sad, anxious, hopeless, lonely, etc. I look in the mirror (seriously, go look at yourself) and repeatedly say (out loud; just shut the bathroom door), "I'm a beloved child of God, I am Strong, I am Powerful, and I will make a difference in My Life AND the Life of Others." How does this make me feel better?

1. I'm a beloved child of God. The one and only God. The one and only god who sent HIS beloved child to die for me. FOR ME. I can't be worthless. Jesus hung on that cross for me. He carried all my sins, and loves me anyways. Wow.
2. I am Strong: No worldly thing will bring me to my knees. No worldly thing will break me. No worldly feeling will overcome me.
3. I am Powerful: Powerful in the sense that the words I say and the things I think affect my life and other's lives everyday. I can save myself or someone else from the edge, or push them over it. That's power. What will it be?
4. I will make a difference in My Life: I don't have control of this life. God does. However, each and everyday I can do something to make the life I live a little bit closer to the way it was originally imagined to be. I WILL become something greater everyday.
5. And the Life of Others: Live for others, because its not about you. The pain you feel isn't selfish, but turn it around. Make it into something that can help to heal others who are feeling the same way. Do it because you can, and because you want to. 

And there it is people. How to Get Rid of that Stinkin' Thinkin'. Discover the things that affect you the most, and affirm yourself that those things cannot bring you down.. because they're just things. :)


Wednesday, October 8, 2014

Into the Wild Blue Yonder

In August, my fiance and I traveled across the country to visit our friends in Williston, North Dakota. We began our journey in Richmond, Ohio and over the course of almost 2 weeks, we made it to Glacier National Park, Montana, and back, with quite a few stops along the way. I'm gonna share some of the pictures from the trip here, with a quick description of each.

Unfortunately, a multitude of people are perfectly satisfied with visiting the ocean year after year in today's world. I'm not one of those people. Something I've realized recently is that I'm a bit of a free spirit. I feel almost claustrophobic by the thought of not seeing the beautiful place our great God has provided for us. This was the beginning of branching out and tackling those things on my "list"- those things that I must do in order to live my dreams within the realm of reality.
P.S. ---> Thank you Tyler & Ashley for making this trip possible for us!

There is no rhyme or reason to the order of these photos. That would be way too complicated.. Lol

Location:
Going-To-The-Sun Road,
Glacier National Park,
Montana.


Location:
Inside a Glacier on the Mountainside,
Going-To-The-Sun Road,
Glacier National Park,
Montana


Location:
Going-To-The-Sun Road,
Glacier National Park,
Montana


Location:
Leaving Glacier National Park,
Ashley & Tyler (our friends who took us on this adventure are on the right),
Montana


Location:
Jackson Glacier,
Glacier National Park,
Montana


Location:
Glacier National Park,
Montana


So there are a few pictures from the journey. About 3% of the total pictures taken, however, I'm soo not loading all of those on here. If you wanna see more, make the journey yourself!

Some Places to See:
Richmond, Ohio                                 Billings, Montana
Lake Erie, Ohio                                  Glacier National Park
Chicago, Illinois                                 Medora, North Dakota
Some Random Place, Wisconsin       Badlands National Park, South Dakota
Mall of America, Minnesota              Mount Rushmore, South Dakota          
Williston, North Dakota

Tuesday, October 7, 2014

The Easiest Pumpkin Cookies You'll EVER Make

There are very few days that go by that I don't end up trying some new recipe for dinner, or baking some new concoction that came to me in my sleep. When I was younger, I discovered this recipe for "Cake Mix Cookies." I did a little tweaking to the original recipe, and soon it became my own. It was even published in our church cookbook.. I know, I'm pretty awesome. Anyways, it has got to be one of the easiest recipes ever known to man to make yummy soft cookies. When I came across another version of these cookies, I thought I'd give it a try and just spice things up my way... That is how Pumpkin Cookies with Cinnamon Sugar Roasted Pecans came to be. These cookies are seriously SO simple and taste amazing, and can be tweaked however you want. These are perfect for family gatherings, or a movie night on the couch. Here's what I did...

These things are all you need in order to make these divine cookies. Is using cake mix cheating? Sure. Do I care? Nah. 
Now, I know not everyone has access to these divine nuts on an average day. I actually acquired these Pecans for free from a wonderful man in Dallas, Texas selling them (That's a story for another day). However, I know that many malls all over the country sell these nuts around holiday season, and you can get some then. :)
The first step for making the cookies is to dump all the ingredients which will be listed below into a bowl and combine until a soft dough is formed. 
 Once you have the dough made, drop spoonfuls on cookie sheets.
I ended up with 24 cookies exactly. If you don't have a cookie scoop, just use a spoon. Its not that serious. Lol
 Bake those bad boys and your finished product will look like these! Serve warm, cold, or frozen. No one will care, just as long as they get to eat them. Trust me. 

Pumpkin Cookies with Cinnamon Sugar Roasted Pecans

Yields: ~ 24 Cookies

1 box Pumpkin Cake Mix
2 Eggs
1/2 C. Canola or Vegetable Oil
1/2 C. Cinnamon Sugar Roasted Nuts

1. Preheat oven to 350 degrees. 
2. In a medium-sized bowl, combine all of your ingredients until a soft dough forms
3. On a non-stick cookie sheet, drop dough by spoonful about 1-inch apart 
4. Place cookies in oven and bake for 10 minutes. Check your cookies at around 8 minutes to be sure they are not over-cooking. All ovens are different. Your cookies will be done when the bottoms are golden to a semi-dark color on the bottom
5. Remove from oven, allow to cool, and Enjoy!!
 

Wednesday, September 24, 2014

Who Am I?

I'm pretty positive that I don't have any followers just yet who don't know who I am, but I figure I'll give you all the quick run through... You never know when you might learn something new :)

1. My name isn't really Annie. Its Annabel. I've never gone by anything other than Annie however, except to my father who often calls me by my actual name, even when I'm not in trouble.

2. I'm 19 going on 40, between the ears that is. I like to believe I don't quite have the physique of a 40 year old just yet, however, in an attempt not to offend, I must say there are some pretty hot 40-somethings out there (that means you mom!).
           - Note: Maybe I'm not quite 40 between the ears, but remember those days when you used your imagination to play pretend? Yeah, let's revert back to those days. Great, Thanks.

3. I'm sarcastic. I'm engaged. I have a cat, Missy, and a puppy, Sydney. I go to THE Ohio State University (Yeah, I went 'THE're). I'm a business major (as of right now). Cooking is my passion. I like applesauce, a lot. I like walks on the beach and long-stem red roses.. <-- Who doesn't?

That's probably enough about me. Let's be honest. You are not here to read about me. You're here to steal my cupcake recipes, and look at pictures of my puppy who just so happens to be the cutest thing since this...
If you happen to think this hedgehog is not cute, you should probably just remove yourself from my page now.

Anyways, I'm gonna go cook some cheap steaks ('cause I'm also cheap) and think of a way to dress Sydney up as a hedgehog in order to be recognized as the creator of the cutest thing on the planet.

You Have Reached Your Destination

I caught myself reading today for the first time in a long time. I don't mean reading like what you all are doing right now. Not skimming textbooks for the correct response, or reading the TV guide to see what is on next, or the take-out menu at work so I can order lunch. I mean I caught myself engulfed in a book that had absolutely nothing to do with anything going on in my life in that moment, yet somehow I felt completely at ease, as if the book had taken me to a place I rarely get the chance to visit, a place outside of my understanding- a peaceful place. Far too often we get caught up in the everyday (I know, I'm preaching to the choir, but hey, my grandma IS the choir director). I am guilty of this more often than not, but as I was sitting there lost in the words of a book about a person I could only relate to in my dreams, I realized just what it might take for me to get lost in my dreams everyday yet everyday to wake up in reality. How awesome would that be? To know that the sky is the limit. To push yourself in every moment to become something you never thought you could be. To stumble and fall but to pick yourself up and still be walking in the heavens. In order for one to do this, you must be able to let go of the outside world, and visit that place you pause to think about only on rare occasions. Its been a long time since I've had dreams bigger than my own comprehension, but I've decided it is time to act because the future is waiting. A dream of mine for a long time has been to start a blog, and to share with others my musings which are sometimes outside my own realm of understanding. I can't be sure what may come next in my posts, but stick around to follow me on my journey to the place where dreams become reality.

PS: If the top of your page says "Trial and Error," its not an error on your computer. All of the world's greatest successors have infinite experience with trial and error. I'm just documenting mine and sharing it with you!